FREE PRIORITY SHIPPING FOR ORDERS OVER $50 A GREAT GIFT FOR SKIERS AND BOARDERS

HOME / PROCESS / INSTALLATION

INSTALLATION

With half the time, screws and mistakes of other products, Good Racks is the easiest way to show off your gear. Its guaranteed to hang straight and no measuring required! All you need is a screwdriver, though a level might be helpful.

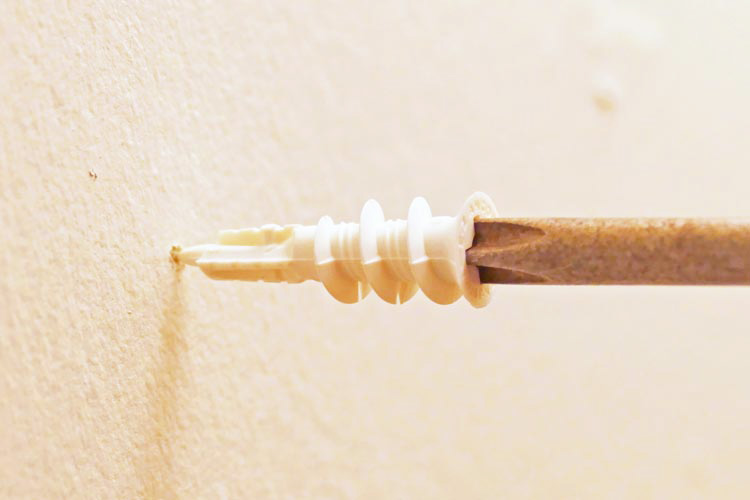
Step 1: Mark anchor holes

  1. Check that your skis fit in the rack, then choose a location. (inspiration)
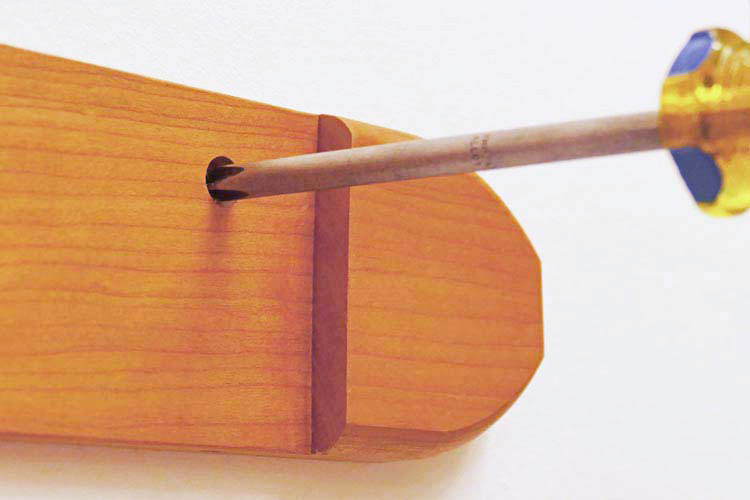
  2. Screw the metal screws through the holes in your rack just enough to poke out the back side.
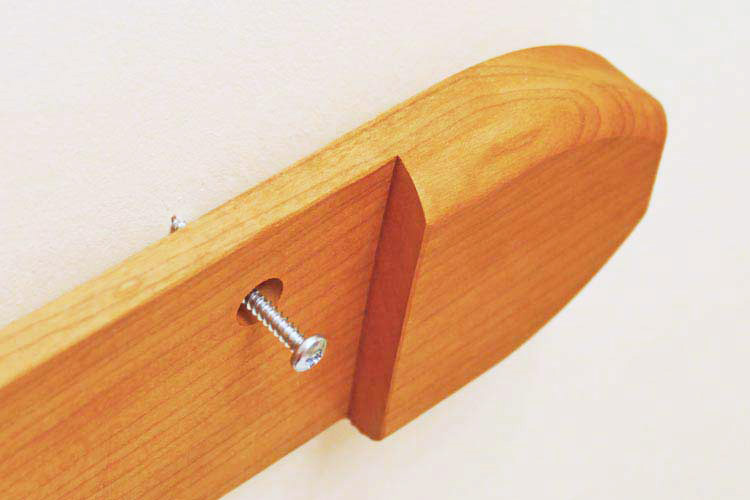
  3. Hold the rack in its desired position on the wall and apply pressure so that both the screws poke small holes in the wall. If you have one, a level might help with this.

Step 2: Install drywall anchors

  1. Using a Phillips hand screwdriver, press the anchor tip into the hole created by the screws in step 1.
  2. Applying pressure, turn anchor until flush with drywall. Do not over-tighten!
  3. Repeat for the other screw hole
  4. If you hit a stud then just remove the anchor. That screw will be screwed directly into the stud instead of into an anchor.

Step 3: Install Rack

  1. Place board, with screws back against desired position on wall. The screws will line up with the wall anchors/holes.
  2. With pressure, hold the rack against the wall and turn each screw into its respective anchor. You will hear an audible click halfway, which indicates the anchor is secure.
  3. Check that your rack is rigidly attached to the wall, then mount your gear. Don't forget the brake ties if you're mounting skis!

Hanging multiple racks?

While there are many ways to install multiple racks, we think that vertically aligning the center of the skis and boards is the best way to go. Other options include aligning the tops, the bottoms, or aligning the racks themselves. There should be a roughly 2 inch horizontal gap between racks.